

Light Up Your Holidays With DIY Tissue Paper Lanterns
December 19, 2020
This December we tried out a DIY that’s super easy and fun to make: tissue paper lanterns. These festive decorations can be displayed anywhere or even gifted to a friend for the holidays.
The lanterns were easy to customize, and ours ended up having unique designs. However, the steps we used to make them were still the same. Follow along to learn how to make it with tips from our experience:
Step 1: Gather your materials.
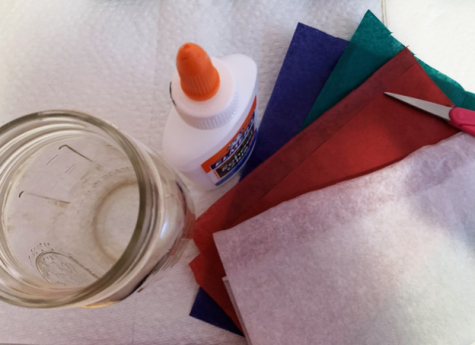
For this DIY, you’ll need the following materials:
- Glue– we used Elmer’s glue for one lantern and Mod Podge for the other. Both worked equally fine.
- Tissue Paper– up to one sheet total, or multiple different colors.
- Scissors– optional if you want to rip the sheets with your hands instead… we won’t judge.
- Glass Jar– this is a perfect way to repurpose some old jelly jars you might have lying around
- Candle– optional if you’re just using it for decoration, and not as a lantern.
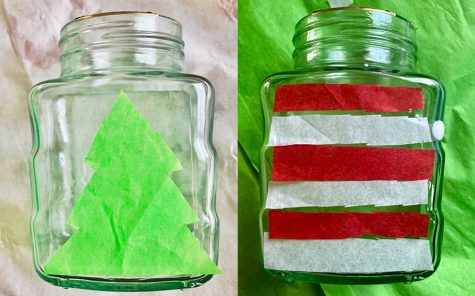
Step 2: Plan your design.
With the paper you have, decide what design you want, and then cut out the shapes from the tissue paper. Lay out the pieces to see where to place them on the bottle.
If we were to make another lantern again, it would be better to have a clear vision before we started. At some points we had to peel tissue paper off the lantern, which wasn’t ideal.
Another tip: avoid white tissue paper. It ended up looking really transparent and more crusty than anything.
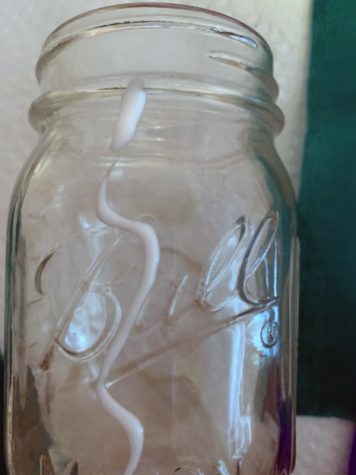
Step 3: Glue on the paper
Next, spread a thin layer of glue over the bottle and place the tissue paper pieces over it. Be careful though, because sometimes our glue got really messy and made the tissue paper bunch up.
For designs with more than one layer, glue the first layer down and wait for the glue to dry to the point where the paper doesn’t move when you touch it. Then, repeat the process with the second layer. With the second layer, you’ll have to keep layering the same shape with the tissue paper for the design to show. Otherwise it’s too transparent.
Step 4: Wait for the glue to dry and enjoy your new lantern!
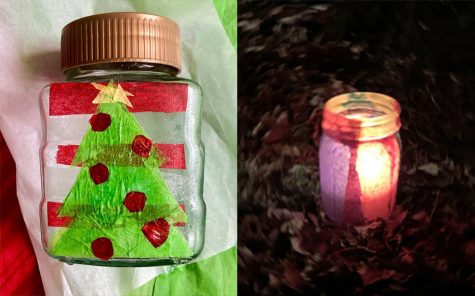
(One last tip: fake candles are nice to use if you want to use it overnight to avoid fire hazards.)